As promised here is part 2 of the Photoshop Tutorial. (See Part 1 here)
I took lots of screenshots with instructional notes. I hope it is easy to follow!
I took lots of screenshots with instructional notes. I hope it is easy to follow!
First you need to create a square to put your icons in.
Then I create guides to help me.
Next you want to convert your icons to Smart Objects. This is super important. If you shrink an object that is not a Smart Object and then make it larger again it looses information. Arranging icons for a repeat requires a lot of sizing up and down to get things just right so, convert to Smart Object.
A resizing tip: hold the Shift Key down as you resize the image from the corner of the Move Tool bounding box. Another tip for dealing with Layers: Make sure the Auto-Select box is checked on your tool bar. When you click on an icon the Layer is automatically selected.
When you "Save As" your icon arrangement Save it as a Photoshop File so your don't loose your layers!
When I merge my Layers I use Merge Visible to flatten them..
Now you can define your pattern!
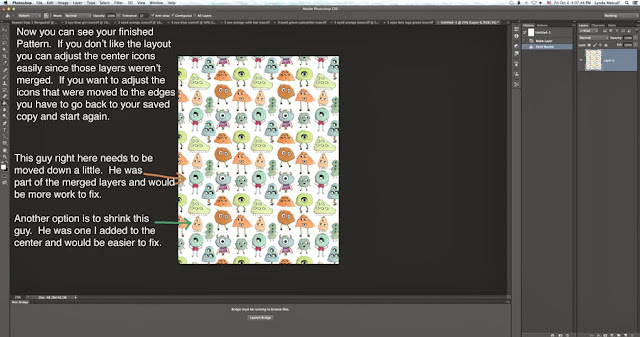
Now you are ready to test your pattern. Choose File > New > U.S. Paper > Letter
You will unlock your layer and fill it with your pattern using the Paint Bucket tool. It looks like a bucket with stuff spilling out. Make sure it is set to Pattern in your toolbar. Choose your pattern (it'll be the last one in the group)
You can try different colored backgrounds for your patterns too (also called colorways). Below is how I do it. Make a new Layer then click the half filled circle symbol to create a fill layer.
After I choose the color I want my background to be I make another new Layer and use the Paint Bucket to fill it with my pattern.
You can keep changing your colored layer and then choose "Save As" when you have a colorway you like.
Don't forget after playing to "Save As" your pattern as a Photoshop file.
This is one I did earlier with a different monster arrangement.
Phew. That's a lot of steps but it comes out so darn cute! I came up with this method from things
I found online. I tried to make my version as visual as possible with notes by all the little things some tutorials seem to forget. Here is a link to making a hand drawn repeat pattern you can scan into your computer. I think checking this out will help you understand the Offset I did.
When I have time in the near future I will send some patterns off to Spoonflower and show how they came out. I don't know what I'll do with the fabric since I can't sew....
Over the next 5 weeks I am going to be knee deep in Make Art That Sells Part B. I am considering writing diary style blog posts of my experience so, stay tuned!
Thanks for stopping by!
P.S. These same steps will work in Photoshop Elements! I checked and the Filter Tab has the Offset choice. Filter > Other > Offset


Hello Lynda,
ReplyDeleteLovely icons!
Thanks for sharing the process and steps. I am new to Photoshop too, so learning a lot from you.
Thanks, May! I never thought I'd be writing Ps tutorials. I'm so glad they are helpful!
DeleteHi Lynda :)
ReplyDeleteI'm Kristi, One of your MATS friends.
Your tutorial is super helpful! Thanks for taking the time to create this :)