Showing posts with label surface pattern design. Show all posts

Wednesday, September 17, 2014

Designing Pattern Collections

I have pulled myself out of my funk after Lilla Roger's Global Talent Search and I'm filled with creative energy. I found the most amazing course on Creativelive.com called Design Surface Patterns From Scratch with Bonnie Christine. Bonnie reveals all her secrets showing step by step how she creates her designs. She uses Adobe Illustrator (Ai) and I have struggled with this program. It can do hundreds of things but I don't need to know everything it does. I only need to know how to use the program to make surface pattern designs. This is the first course I have found that shows you the creative process using Illustrator for Surface Pattern Design from beginning to end. It has great video instruction, lots of info and Bonnie Christine in an inspiring instructor.

Much of her beginning process is what I learned in Make Art That Sells; find inspiration and sketch, sketch sketch. The big eye opener for me was how to transfer my sketches into Illustrator and maintain my hand drawn look. I don't like the perfect shapes you often see in vector drawing so it's very important to me to maintain my style and personality in my drawings. Bonnie uses Image Trace, the Blob Brush, the Pen Tool and the Pencil Tool in various ways to bring her drawings into Ai. I love the Blob Brush so I had a blast using my Wacom Tablet and bringing my sketches into a vector format. My other best friend became the Smooth Tool (which is in the fly out menu of the Pencil Tool). You can use this tool to smooth out your lines if they're a little wonky. It also works well with drawings brought in with Image Trace to help smooth out lines and reduce anchor points.

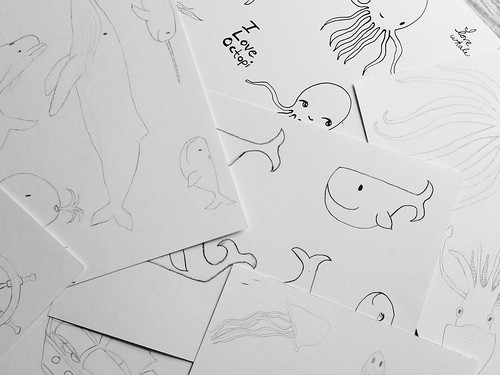
I went through my sketches for the nautical assignment from Make Art That Sells Bootcamp and started my first collection.

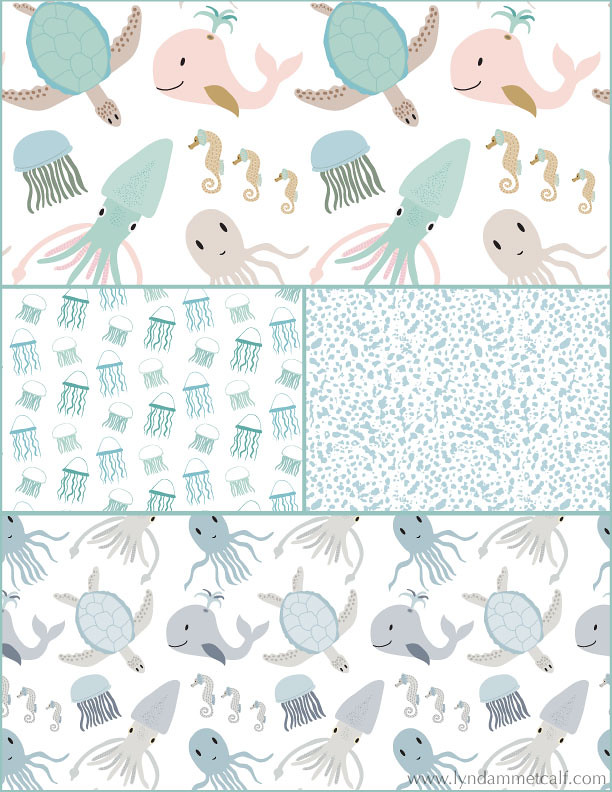
My main print is the sea creature print which I've done in a girl themed colorway and a boy themed colorway. I created a supporting jellyfish print and the abstract dot print is actually a piece of coral I photographed and Image Traced it to change it to vector. Using photography for vector drawing was something I hadn't tried before and it's so cool!

One thing Bonnie doesn't use often is the Pattern Tool new to Illustrator in version CS6. I'm going to try and see if I can conquer it. I used the Pattern Tool to make the above patterns. I think some artists don't like it because it's easy to see where the pattern begins and ends. As long as you keep moving items around you can create a very interesting pattern. I'm also doing a course from Laura Coyle that talks all about using the Pattern Tool called Pattern Power. It's very thorough and it's free when you sign up for her newsletter. You need to have knowledge of Ai though for Laura's course. If you or a real beginner it will be overwhelming.

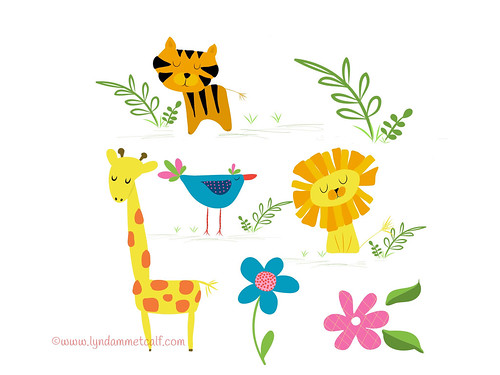
What I can't wait to dig into is putting the sketches I've made in Adobe Ideas into Ai. Adobe Ideas is a vector app that works with Illustrator. You can upload your files straight into Ai from Ideas as long as you have a Creative Cloud account and wifi. Check out these cute critters I made! The only downside is you have to clean up a lot of stray anchor points when you bring it into Illustrator.

If you are interested in creating patterns from your art I highly recommend Bonnie Christine's course. The beginner and the professional alike will find this course helpful and inspiring. If you are new to Creativelive.com they often send out a coupon (I got one) to purchase past classes. Bonnie's course is around $80 and so worth the money. Other courses I've had my eye cost $100's more and this one has everything you need to get going. Below I will provide links to all the things I've mentioned.
 
 
I hope you find all this info helpful. Thanks so much for stopping by!


Friday, September 27, 2013

Making a Repeat Pattern in Photoshop CS6 Part 1

Part B of Make Art That Sells is coming up. I have been trying really hard to learn Photoshop (Ps) and Illustrator (Ai) since the end of Part A. I have gotten a better grasp of Ps. I have taken some courses and am an avid watcher of Lynda.com. All I am learning though is bits and pieces of things. I specifically want to use my art in Ps and not all the tutorials on Lynda.com address my needs. So, I've scoured the web for free tutorials and I am finding my work flow. Here is a piece I created in Ps from my art.
My friend, Nolwenn Petitbois asked how I did it so, I thought I'd write a step by step. Just so you know, I am quite new to using software and writing how-to's. There may be faster ways of doing things. This is how I am working now. If anyone has suggestions or faster methods, let me know. I am totally open to learning!
The first thing I do to make life easier is, I create my characters (also known as icons) on a white piece of paper. I'll show how I isolate art from an existing piece at a later time. I suggest using hot press watercolor paper or bristol paper. Anything very smooth. My scanner picks up everything and creates shadows if there is texture. Scan your art at 400dpi or 600dpi into Photoshop. You can scan as a Tiff or a Jpeg. A Tiff keeps more information.
Here is the sheet of monsters I scanned into Ps. I double click the Layer to unlock it so I can edit. You will be prompted to name the Layer. You can if you want. I usually don't. I also keep my History Panel visible so I can easily jump back a step or more if I need to.
Use the Crop Tool to select your icon.
Then use the Magic Wand tool to erase the white around your image. Think of it like cutting it out of a piece of paper. Click on all the white areas you don't want then hit the Delete button.
After you hit delete you may see stray marks or things you just want to clean up to make your image better. I use the eraser tool for that.
Take your time with this tool. You don't want to erase any areas by mistake. (If you do, you can go back a step in your History panel). Use the bracket keys on your keyboard to make the eraser bigger or smaller. I use the Command Key (Mac) and my + and - keys to make my image bigger or smaller. (I believe it's the Control key on a PC.) The Magic Wand should get rid of almost everything so you don't have much finishing work to do. You should end up with an icon with no background.
Now you need to Save your image without loosing all your other icons. I always, always, always use "Save As". It's a great habit to get into so you don't loose any original work and I am not cluttered with copies. This is how I do it. (I'm sure there are many programmers screaming at me right now, horrified that I don't make a copy of the original to work on first.) I also suggest you create files to put your icons into. This monster lives in a file called "Monster Icons" in Pictures on my Mac. Creative huh?
In the next part I will show you what I do to put these icons into repeat patterns. A repeat is something that is used for fabric. You can go to sites like Spoonflower and have your art made into fabric. Pretty cool huh?
I hope you liked this tutorial and that you found it helpful and easy to follow. I tried to take lots of screenshots with notes to help you. And if you are a savvy Ps expert who has any tips to share, I'd love to hear them! I also have Photoshop Elements 11 and it has the Magic Wand tool so you should be able to follow these directions!

Thanks for stopping by!

P.S. - This post is part of a Blog Parade from the students of Make Art That Sells. Just click this Link to see the blogs from these wonderful artists.

Monday, June 3, 2013

Learning New Things and Growing My Career

I just finished Module 1 of Rachel Taylor's The Art and Business of Surface Pattern Design. I had never considered surface pattern as a career option. The computer aspect scared me. This particular module doesn't require using the computer, though you can if you want to. It's primarily about creating designs and coming up with concepts. All the exercises can be done with paint and paper if you want.

This course was an eye opener for me. Everything you create. Every mark you make can be used in your surface pattern art. To me that takes so much pressure off. Just having the idea that everything has potential is o freeing creatively. I did give the software a try. (My accomplishments on the computer are sprinkled through this post) The industry uses Illustrator and Photoshop and Adobe offers a 30 day free trial of the software. Module 1 included bonus exercises for the software and I actually managed to follow the directions to create things! The entire module is PDF based. No video lessons. I'm a video learner so off to Lynda.com to watch videos on the software to get a better grip on things.

I enjoyed the class. There was so much information and I found it helpful. My only criticisms would be a lack of video instruction. There doesn't seem to be video instruction all in one place for surface pattern design using Illustrator and Photoshop. I'm still looking around though and I've found some things that look helpful. Even though I don't tend to use software when I create, I can see so much potential now having some experience with it. There was also a very limited chapter on character work. Characters are one of my favorite things to create, more so than florals, which Rachael Taylor is brilliant at. I think if the course included an interview with someone who is successful with characters in the surface pattern world.

I haven't decided if I will be taking the next two Modules in the class. Right now I'm taking Lilla Rogers' e-course, Make Art That Sells. This course goes over ten markets that want artists' work. I'm very excited for this course. It started today and it was filled with eye candy and oodles of info. I see changes in my career this summer. I'm going to continue learning Photoshop and Illustrator. I'm going to get that Etsy shop opened. I'm going to be building my portfolio.

Thanks for stopping by!